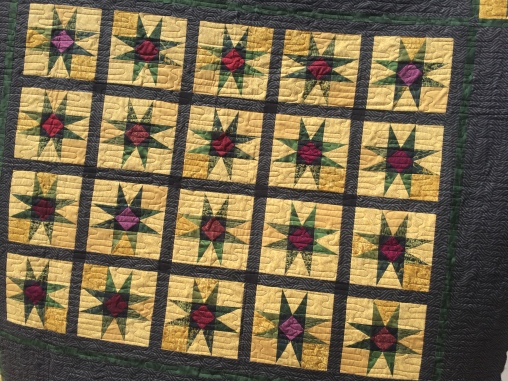


At the start of this week we went on a road trip. Cindy (mom), Tracy, Misty and myself piled in a Honda Pilot and set off towards Dallas. We drove late Sunday night after the shop closed. We laughed more than humanly possible, ate yummy food, and arrived at the hotel without any limbs lost. There were moments when we were all too tired. By moments, I really mean 4 solid hours of laughter, yawns, and too many snacks. Shhh! If you ask me how much snack food I consumed in the car, I will not give a straight answer.

Nevertheless, we made it to Dallas late Sunday night, just to wake up EARLY Monday morning to drive to the Moda Warehouse. Hello sweet mother-load of fabric! The amount of fabric shoved into this warehouse is incredible!

Once we arrived at Moda, we grabbed our cart, and stormed off. Okay we didn’t really storm; it was more like we all scattered, each going in a different direction. I had control of the cart. Someone had to monitor everything we were going to buy. 😉
This wasn’t our first rodeo, so we had learned the layout and what a trip to Moda Warehouse looked like. We knew we wanted the big cart and how they had the fabric organized.

I wanted Grunge. I focused there and just started grabbing off the shelf. It looked unorganized, but I knew the colors we had (thanks to pictures on our phones) and I was trying to fill in colors we needed plus restock our low inventory. Everything else we looked at was for restock or something we had seen and had an interest in. Many aisles I avoided, skipped, and just couldn’t focus long enough to walk down.
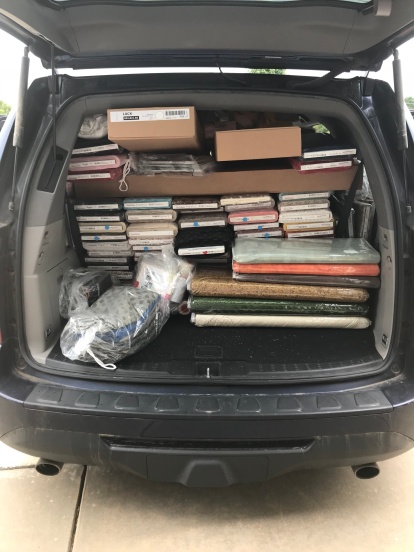
Moda Warehouse can be overwhelming. It is extremely tempting to grab one of each fabric and walk out with a Semi Truck FULL of fabric. Remember, we only had a Honda Pilot to fill. A Honda Pilot that also had four ladies and was making a trip to IKEA after Moda… Our space was limited.

We have added precuts, Grunge, Christmas and Halloween fabric. We also added patterns, notions, and much more! You will have to stop by the shop, or jump online to see what is new.
After Moda Warehouse we jumped in the car and drove off to IKEA. We can’t ever make a trip to Dallas without a quick stop at IKEA. Many of the shelves at the shop are from IKEA, along with quite a few repurposed items. For example, a TV cabinet holds our Minky, “trash cans” are spotted throughout the shop full of fabric, large planters, tables, garden trellises, and floating shelves are also stuffed with fabric around the shop. I love walking through IKEA trying to figure out new uses for different items.

After reorganizing our car to fit everything we found, we were off. Take two seconds to imagine four ladies pulling too many bolts to count out of the car, just to fill it FULL… again! I’m sure it was a sight to see… hopefully no one videoed that mess.

We made it back safely, and the new fabric is out on the floor. It was a quick 24 hour round trip, but worth every minute.
See you at the machine (with new fabric),
Care
It is Tuesday! We are ONE DAY AWAY from our biggest challenge, change, project QH has ever tried to tackle. There will be mistakes, we will still be crawling along, learning as we go, but the end result should be amazing.
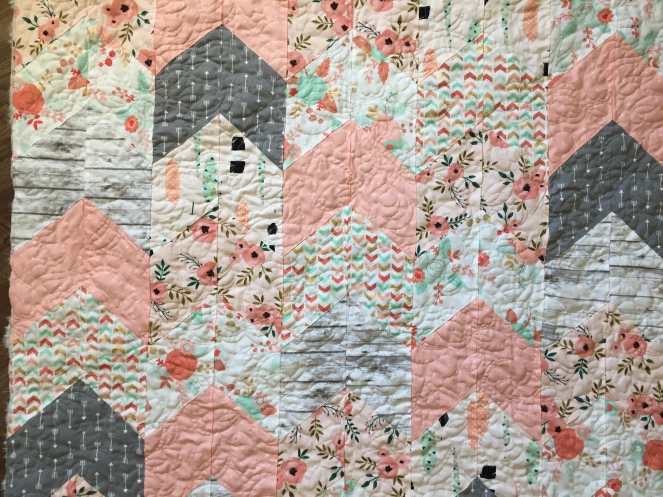
Tomorrow, you will have to check out our NEW website!
The class calendar, in my opinion, is much easier to operate, and you can even sign up for classes. You might just have to give us a few moments to get everything set up.
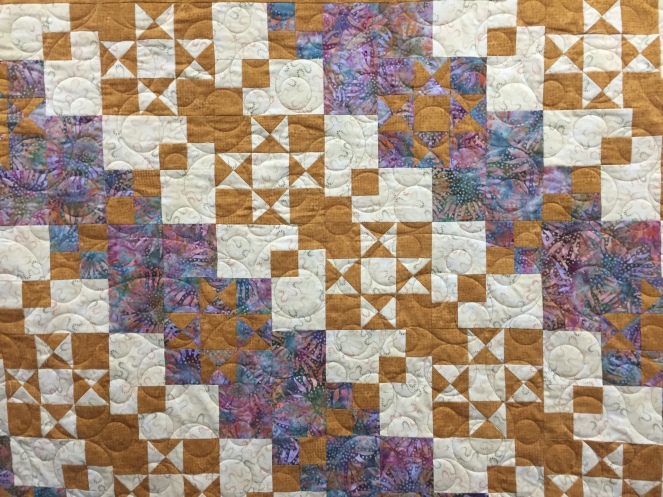
We are still working to get everything set up: every bolt of fabric, notion, ruler, etc had to be re-input. That part has been gross!
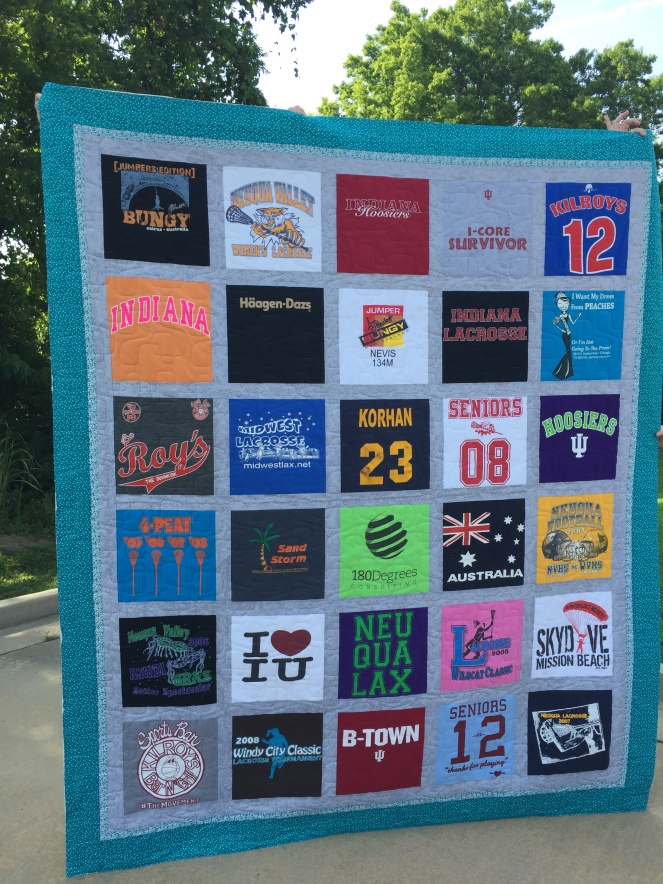
I miss my sewing machine. Millie, our longarm quilting machine, has been putting in long hours, but that is the only machine that has really seen any operating time. I miss it.
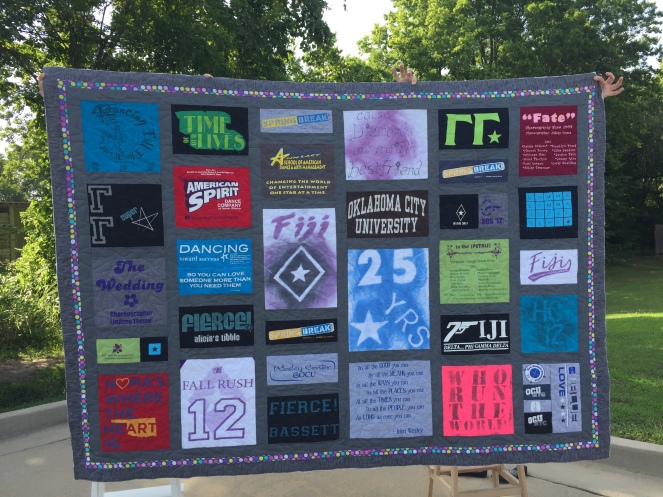
I’ve received two spectacular machines recently, and they are begging to be used. Soon. I keep telling myself that it will happen soon. When it does, you bet I’ll be sharing with you. TWO MACHINES! You will be meeting them soon.
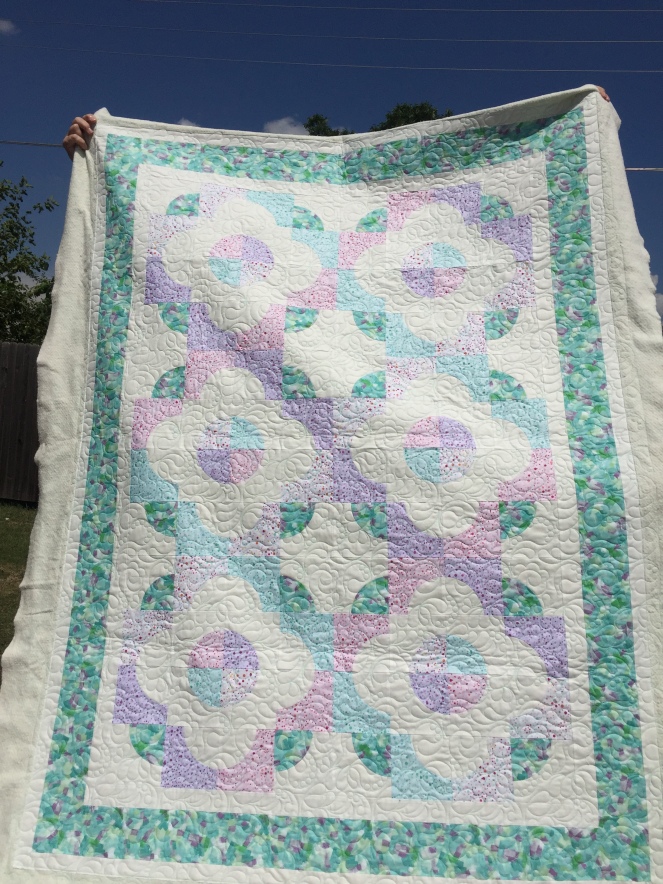
Until then, I’ll be looking through photos on my phone and trying to share some of our older quilts that we have quilted.
See you at the machine,
-Care
It has been awhile since a blog made a presence. I blame… life. Every time you think things are about to level out, something else comes up. I think there will just always be something. Recently, I was in a good friends wedding the weekend before we were supposed to be selling our house and buying another house which all was happening about a week before a huge program change at Quilter’s Hideaway. I’ve always said I would rather be busy than bored… 🙂
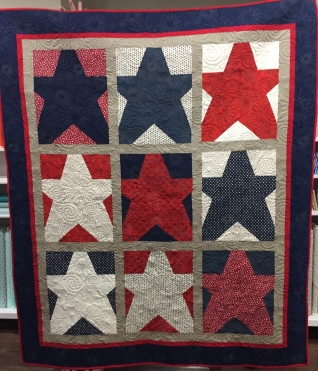
A couple Friday’s ago, when we were about to leave for my friend’s Rehearsal Dinner, Dalton and I received word that our seller was still lacking some paperwork and our move was postponed. I think it probably worked out for the better looking back. I was able to spend more time at Quilter’s Hideaway working on Millie and preparing for our biggest challenge yet—changing to a new point of sale system. We were also able to rest up more following the wedding before moving.

Our move ended up being postponed one week, two weeks before we are/were to go live with our new system. The move happened fairly uneventfully and we are now full focus on our new system.
Side note: This move symbolized so much! We were sad to leave behind certain things at our old house—a shed my brother-in-laws, father-in-law, and husband built, our “first” house as a married couple, the place we introduced our youngest puppy to our family. However, this move meant that QH was successful! (AMAZING) It meant that it was time to move closer to the shop and shorten my over-an-hour drive to work every day. All our hard work was paying off, and I could not be more thankful for YOUR support.
If you have entered the shop in the last week, you noticed it was a little chaotic.

When we opened the shop our goal was to merely open. The details were all slightly foggy. We were learning as we went and the Point Of Sale system we started with wasn’t handling our growth well. There were components of it that I loved, but mostly it was a pain. We have been blessed with incredible growth, and with that, we are going through a few growing pains.

We made the decision to change our Point of Sale system, which also means we are changing our website, newsletter process, and so much more. It is exciting. It is nerve-wracking. It is a learning experience. It might be a little stressful.
I have had more than one bowl of ice cream this past week; whatever it takes, right?
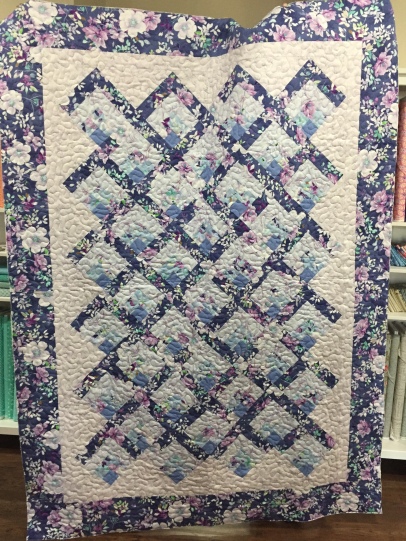
To say I am excited for this new system is an understatement. Do I like this conversion process? Absolutely not. Is the timing a little iffy? You bet. But I can see a light at the end of the tunnel. I also feel like it is time to make a change now, while we are still young. We just celebrated our 1.5 birthday, after all.

Stick around. The next few weeks are going to be pretty awesome. I might have an ice cream party at my new house if we all make it through this.
See you at the machine,
Care
Happy 2018! It is a new year, and we have so many things on the agenda for the shop. I’m not a huge New Years Resolution person, but I am really hoping to find time to blog more this year.
With that said, I am also helping to continue learning more on Millie, and I started early learning new things this year. On Christmas Eve/Day, I quilted a custom quilt for my Brother-in-Law. Somehow, my two brother-in-laws have been able to convince me to only quilt custom for them. It has always been a large learning curve. Each time, I have learned new things, and thankfully the quilts always turn out great!
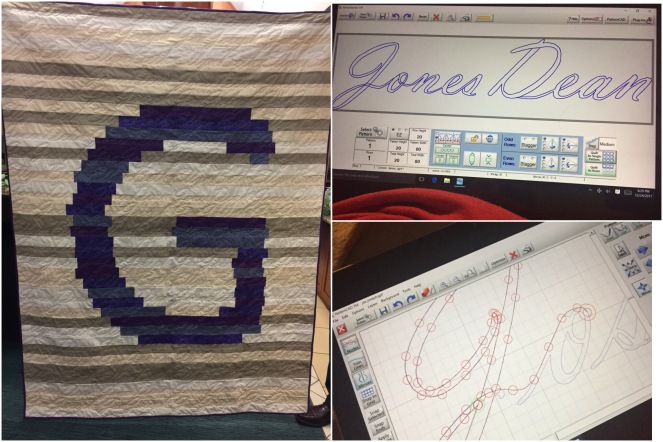
This particular quilt was a gift for the man officiating his wedding. The family’s last name starts with a G and they have three kids: Ellyn Beth, Jax Joseph, and Jones Dean. I promise we checked the spelling multiple times during this process, but it still made me nervous.
Devin, my brother-in-law, had the idea to quilt all of the childrens’ names into the quilt. It sounds easy, doesn’t it? Well… I couldn’t find an easy way to do it without a ton of jumps between every letter (A jump is when Millie stops sewing in one spot and moves to another spot. It leaves a stretch of loose thread that needs trimmed.), so I improvised. I spent quite a lot of time in PatternCad, a program in QuiltPath that allows a pattern to be “drawn”.
I grumbled quite often while “drawing” this pattern, but I love how it turned out. Now I want to do a similar quilt for my grandmother with all of the grandchildren’s names, but the idea of creating patterns for all of those names makes me worried.
See you at the machine,
Care
September. It was a month we knew would be filled with working late and waking early, deadlines around every bend, and more celebrations than we could count. We participated in our first shop hop. It was spectacular, but I will have to write again to fill you in on those details, because right now I cannot contain myself from sharing about an event that happened the day after the shop hop ended. On September 10th Quilter’s Hideaway hosted our first charter bus. We greeted almost 60 quilters from Arlington, TX.
Alright. I’m fully aware that it has been a few months since I’ve been able to write anything. This is both good and bad. Good, because we’ve been busy at the shop. I have fully enjoyed meeting each of our customers and working on so many quilts. Bad, because I love writing and I miss you terribly. So, with that said, I’m going to try to do better but I make no promises.
This past weekend (actually, it was two weekends ago), Quilter’s Hideaway went to its first show. We spent weeks cutting fabric, making quilts, trying to be prepared. We had all sorts of helpers helping and sweet friends making sample quilts at the last minute. I think it turned into a great show. Jubilee Quilt Guild of Bartlesville did a wonderful job.

Somewhere in that process I also committed to providing a demo of my choice. I’m so thankful that I did not think twice when I made this decision, because my second thought was “absolutely not”. I was quieter than quiet in high school, college wasn’t much different, and I DREADED every speech in my Public Speaking class. (I’m also very thankful for that class. I now realize every “Umm” that I say… and it’s a popular word in my vocabulary). However, I was committed and not backing down from this challenge.
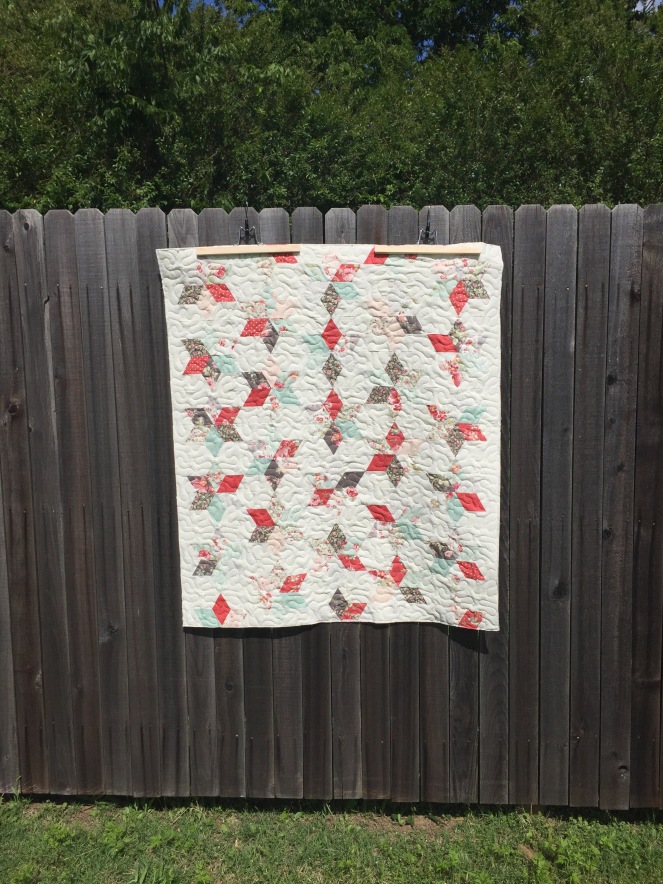
I had recently helped a lady complete a quilt using the JAYBIRD QUILTS Sidekick ruler. I was in love. I’m not a knickknack sewer. I try to use different things around my house instead of buying a new gadget, but I was sold on this ruler. Timing was everything, because this gave me a direction for the demo.

Finally, with a plan in mind I was able to prepare. I watched videos on the Sidekick ruler, videos on how to avoid saying “Umm” and made several quilts using the ruler. I thought, “If the demo goes downhill, I will just show pretty quilts.” 🙂

My most favorite part about the Sidekick, Super Sidekick, and the Hex N More is that there are no Y seams. I’ll repeat that just in case…. THERE ARE NO Y SEAMS!! It is amazing, and brilliant.

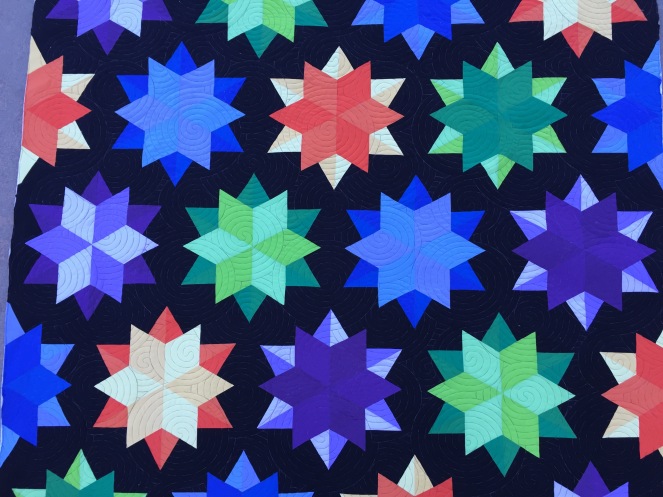
I could not recommend a ruler or Jaybird Quilts more. Her patterns are spectacular too. Detailed, colored pictures are shown at each step and each cut. Then, she breaks down exactly how to assemble the rows to avoid Y seams.
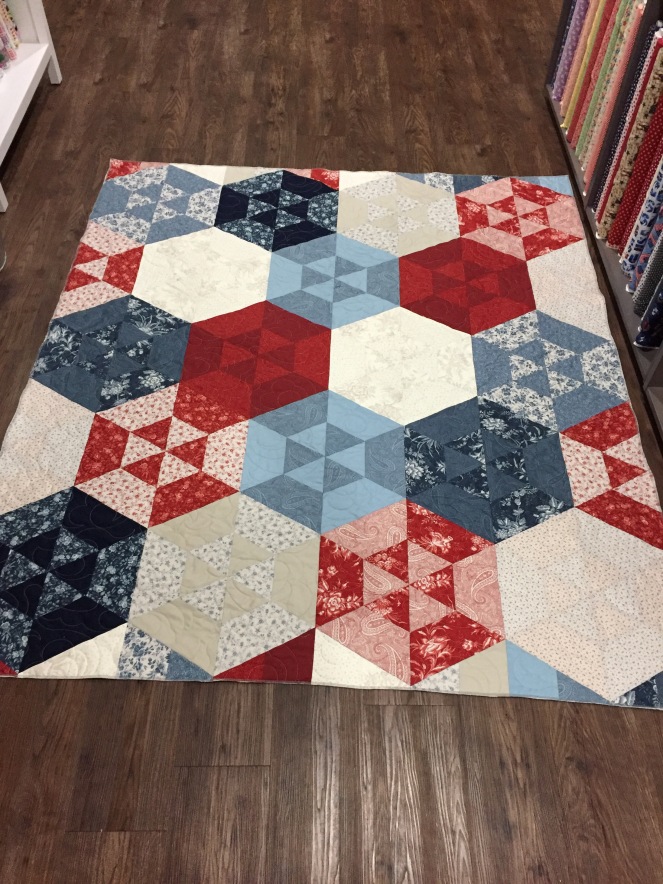
I’m not saying my demo was perfect. It was actually far from that. Mistakes were made, but the first demo and show are both done and I’m ready for the next.
See you at the machine,
•Care
It’s been awhile. And by awhile, I mean way too long. I’ve been working full time plus helping at the shop too many hours to count. This isn’t a pity-party, but a party because that has all changed now!

I’m still at the shop too many hours to count, but that full time job is no longer on the table. I’ve taken a leap of faith, and I’m trying to follow a dream. (Or something like that….)

My husband has decided that I am a “Professional Quilter; Occupation: Quilter.” He made that declaration as I walked in the door one week ago after my last day training my replacement at the full time office job. I think he was under the impression that I won’t need to add to my personal fabric stash, now that I’m around fabric all day. He has no idea.. 🙂
Now that I’m at the shop, and supposedly have free time (I still haven’t seen any or that), we are going to start working of a few fun things we’ve been planning. We are also gearing up to announce our next few months of classes. So far, our classes have been successful, fun, and energetic, so we want to keep that going.
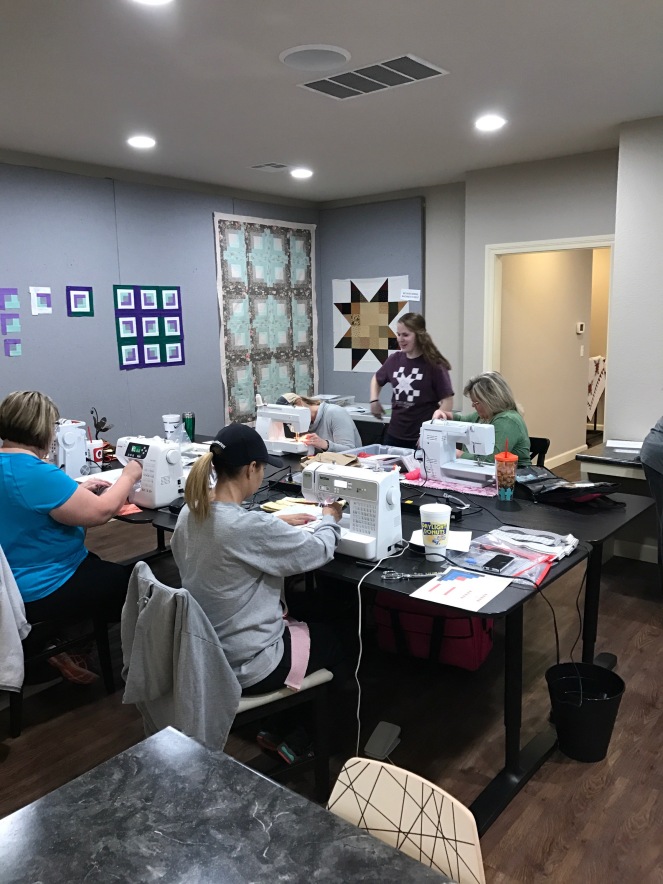
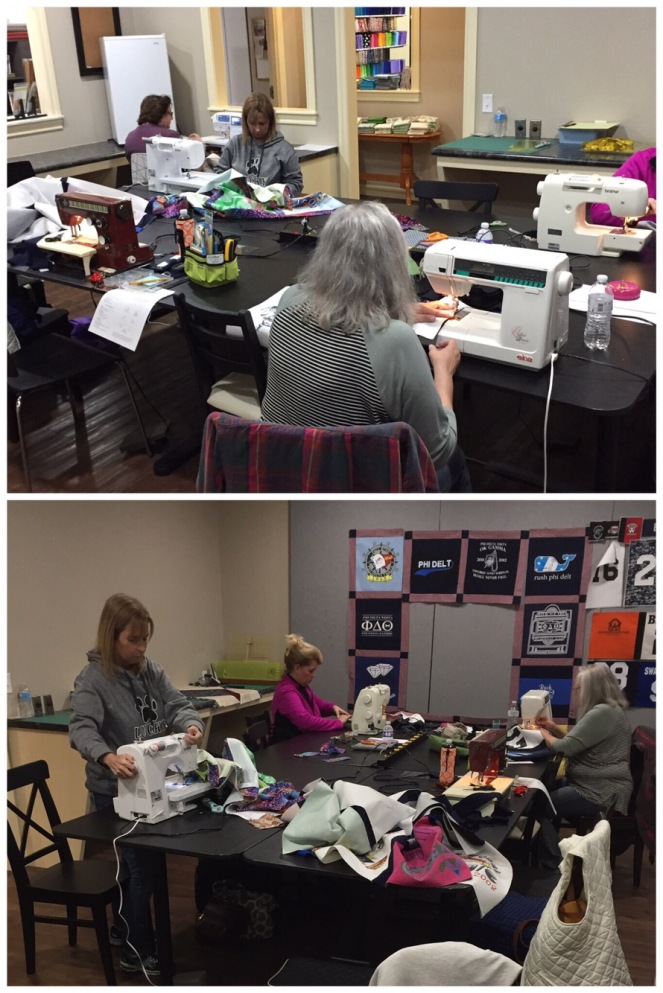
Do you have any fun ideas that you would like to see added?

I did manage to finish this quilt last week, so I will leave you with this picture.
See you at the machine,
•Care
When my mom and I made the decision to open Quilter’s Hideaway, we knew we wanted a way to bring people together. We immediately knew we wanted some form of a sew night where people with different experience and projects could come together to learn from one another, create a community, and encourage each other throughout their projects.

Our Open Sew Nights every Thursday, have slowly molded into this. Although I cannot be at every one (I’m still working fulltime in Tulsa), I receive pictures, and it makes me want to be there every week.
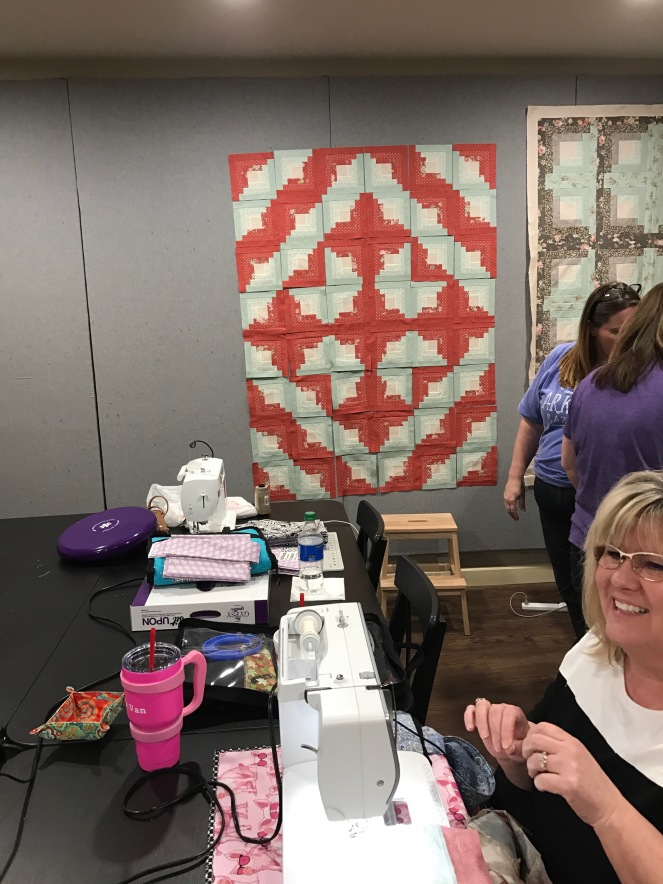
There have been many finished projects throughout our short, two months of being open, many newbies have learned tricks, and friendships have been made around our tables. I’ve learned more about embroidery and so many other things, I’ve seen others teaching how to chain-piece, everyone has a home at Quilter’s Hideaway.

The other thing I love about sew night, is that our design wall is always covered in so many different quilts as people work to find a layout they are happy with. Occasionally I’ll even get FaceTime to give my opinion, or someone will leave a quilt up for a few days to play with until they are happy. My favorite saying when a quilt is on the wall is, “Can I play?” Everyone sees quilts so differently, and I love this.


Everyone has been on a log cabin “kick” recently using our new rulers and upcoming class, but every single quilt has been vastly different. Other than the actual block, the quilts are unrecognizable as the same pattern.
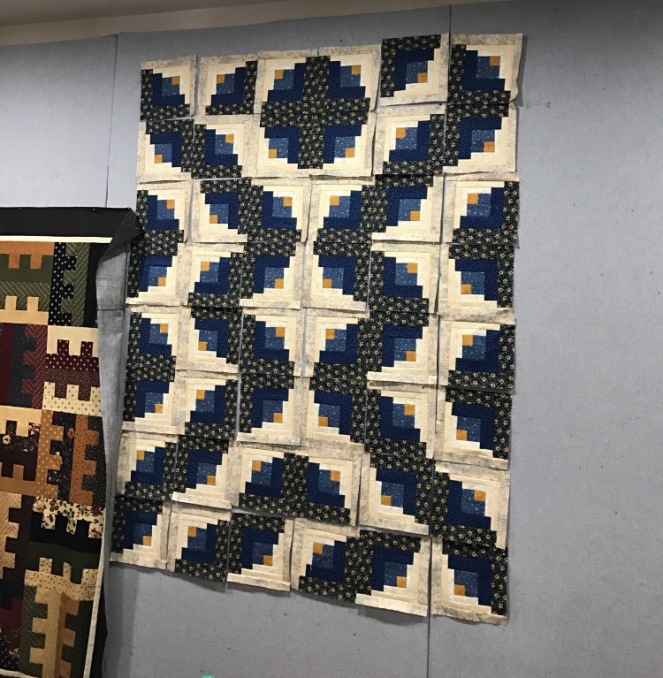
If you are on the fence, or want to surround yourself with funny, encouraging, helpful people, think about coming to our next Open Sew Night. It happens every Thursday. Come when you’re free and stay until the seam rippers come out. Usually the crowd starts forming after 4pm and we shut the party down between 8:30 and 9.
I’ve seen knitting, embroidery, paper piecing, chatting, quilt layout, laughing, pressing, and so much more happening during our Open Sew nights.
See you at the machine,
•Care
Top O’ The Mornin’ To Ya! (I just looked up different St. Patrick’s Day sayings and came out somewhat empty handed. Thanks Google…)
Happy St. Patrick’s day! As I sat in the car this morning before work, I realized that I had walked out the door without any green today… Thankfully, I had a green hair-tie in my car, but does that really count? We could get into the nitty-gritty, or I could share with you a fun, green pattern. Let’s get to it, and hopefully it will make up for my lack of green wardrobe.
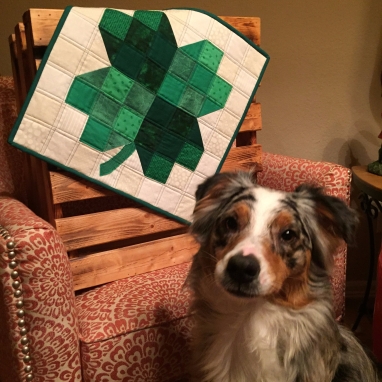
You can mix and match your fabric or use all the same.
Prep:
Dig in your stash for green and cream fabric. Or whatever floats your fancy.
You will need:
1/4 yard of green {clover fabric}
1/4 yard of tan/cream {background fabric}
One fat quarter {backing}
One fat quarter of batting
Two 2” strips {binding}
*You could also use mix and match your fabric as I did.*
Chopping Block:
Cut two 2.5” strips of clover fabric.
Now, cut 24 2.5” squares from the clover strips.
Cut two 2.5” strips of background fabric.
Now, cut 32 2.5” squares from the background strips.
Depending on the width of your fabric, you might need three 2.5” strips.
*Note: If you are unable to get the full 34 squares from these strips, you could also cut down the scraps in the next step to get the remaining squares.
Cut one 3” strip of clover fabric.
Cut this into four 3” squares.
*If you were unable to cut all your squares earlier, use the scrap from this step to cut the remaining squares.
Cut one 3” strip of background fabric.
Cut this into four 3” squares.
*If you were unable to cut all your squares earlier, use the scrap from this step to cut the remaining squares.
Stitchin’ Time:
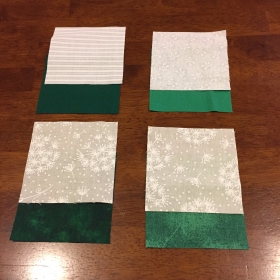
For this step you will be using the 3” squares of background fabric and 3″ squares of clover fabric.
Take one of each square and place them right sides together. Draw a diagonal line from corner to corner.
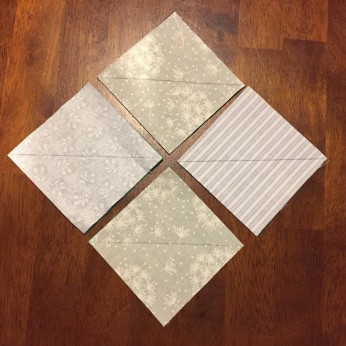
Now sew a quarter inch on both sides of this line.
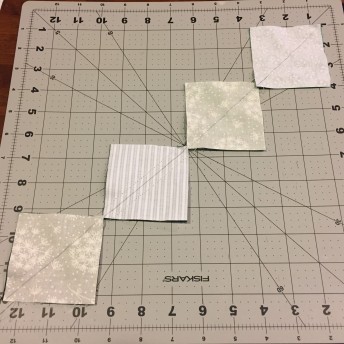
Repeat for all 3” squares.
Cut along the line you drew and press seam.

Trim these down to 2.5” squares.
You should end with eight half square triangle squares.
Assemble your block using the diagram. Once assembled decide whether you want a stem or not. It is personal preference. I decided to add one using a scrap from an earlier step. To attach it to my quilt I sewed lines through the stem multiple times. I wanted it to look like veins on a leaf or stem, but also to be something fairly simple. There are no rules here, just have fun and make it your own.

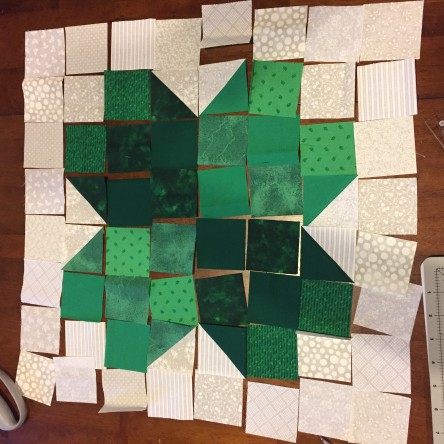
If you press your seams opposite directions for each row, it will be much easier to next each corner and patch your points.

When the top is complete create the quilting sandwich:
Backing fat quarter—Batting fat quarter—Quilt top
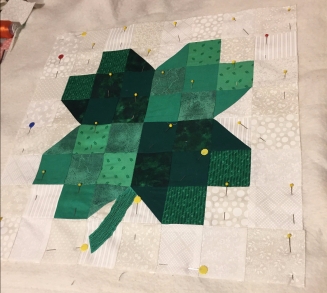
Pin, spray baste, or thread baste the sandwich so you can quilt it together.
Quilt however you desire: stitch in the ditch, horizontal lines, meander, the options are endless.
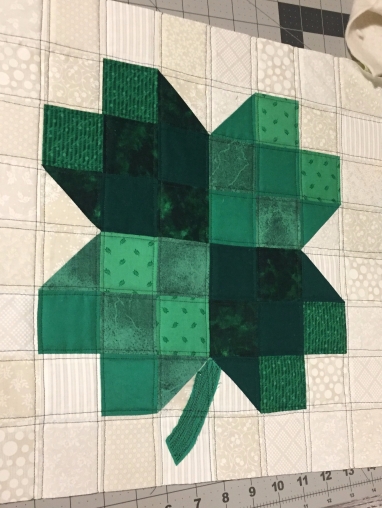
After quilted, trim edges and attach binding.
Finish by sewing the binding, and you will have a completed clover mini quilt.
Finished size: 16.5″ x 16.5″.
Instructions Without Pictures:
LUCKY, LUCKY
Prep:
Dig in your stash for green and cream fabric. Or whatever floats your fancy.
You will need:
1/4 yard of green {clover fabric}
1/4 yard of tan/cream {background fabric}
One fat quarter {backing}
One fat quarter of batting
Two 2” strips {binding}
*You could also use mix and match your fabric as I did.*
Chopping Block:
Cut two 2.5” strips of clover fabric.
Now, cut 24 2.5” squares from the clover strips.
Cut two 2.5” strips of background fabric.
Now, cut 32 2.5” squares from the background strips.
Depending on the width of your fabric, you might need three 2.5” strips.
*Note: If you are unable to get the full 34 squares from these strips, you could also cut down the scraps in the next step to get the remaining squares.
Cut one 3” strip of clover fabric.
Cut this into four 3” squares.
*If you were unable to cut all your squares earlier, use the scrap from this step to cut the remaining squares.
Cut one 3” strip of background fabric.
Cut this into four 3” squares.
*If you were unable to cut all your squares earlier, use the scrap from this step to cut the remaining squares.
Stitchin’ Time:
For this step you will be using the 3” squares of background fabric and 3″ squares of clover fabric.
Take one of each square and place them right sides together. Draw a diagonal line from corner to corner.
Now sew a quarter inch on both sides of this line.
Repeat for all 3” squares.
Cut along the line you drew and press seam.
Trim these down to 2.5” squares.
You should end with eight half square triangle squares.
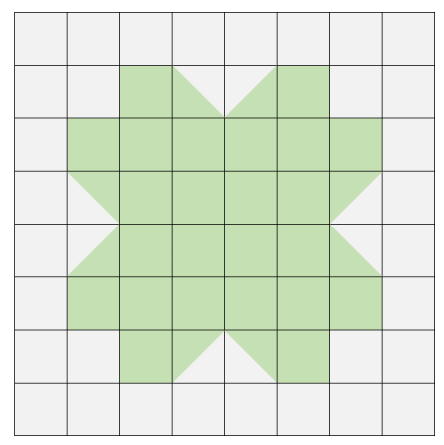
Assemble your block using the diagram. Once assembled decide whether you want a stem or not. It is personal preference. I decided to add one using a scrap from an earlier step. To attach it to my quilt I sewed lines through the stem multiple times. I wanted it to look like veins on a leaf or stem, but also to be something fairly simple. There are no rules here, just have fun and make it your own.
When the top is complete create the quilting sandwich:
Backing fat quarter—Batting fat quarter—Quilt top
Pin, spray baste, or thread baste the sandwich so you can quilt it together.
Quilt however you desire: stitch in the ditch, horizontal lines, meander, the options are endless
After quilted, trim edges and attach binding.
Finish by sewing the binding, and you will have a completed clover mini quilt.
Finished size: 16.5″ x 16.5″.
Happy St. Patrick’s Day!
See you at the machine,