Top O’ The Mornin’ To Ya! (I just looked up different St. Patrick’s Day sayings and came out somewhat empty handed. Thanks Google…)
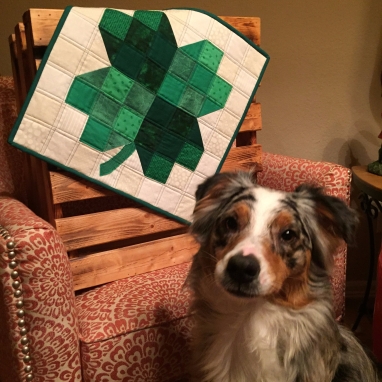
Happy St. Patrick’s day! As I sat in the car this morning before work, I realized that I had walked out the door without any green today… Thankfully, I had a green hair-tie in my car, but does that really count? We could get into the nitty-gritty, or I could share with you a fun, green pattern. Let’s get to it, and hopefully it will make up for my lack of green wardrobe.
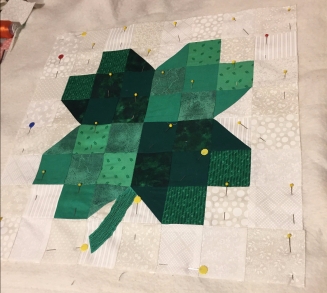
You can mix and match your fabric or use all the same.
Prep:
Dig in your stash for green and cream fabric. Or whatever floats your fancy.
You will need:
1/4 yard of green {clover fabric}
1/4 yard of tan/cream {background fabric}
One fat quarter {backing}
One fat quarter of batting
Two 2” strips {binding}
*You could also use mix and match your fabric as I did.*
Chopping Block:
Cut two 2.5” strips of clover fabric.
Now, cut 24 2.5” squares from the clover strips.
Cut two 2.5” strips of background fabric.
Now, cut 32 2.5” squares from the background strips.
Depending on the width of your fabric, you might need three 2.5” strips.
*Note: If you are unable to get the full 34 squares from these strips, you could also cut down the scraps in the next step to get the remaining squares.
Cut one 3” strip of clover fabric.
Cut this into four 3” squares.
*If you were unable to cut all your squares earlier, use the scrap from this step to cut the remaining squares.
Cut one 3” strip of background fabric.
Cut this into four 3” squares.
*If you were unable to cut all your squares earlier, use the scrap from this step to cut the remaining squares.
Stitchin’ Time:
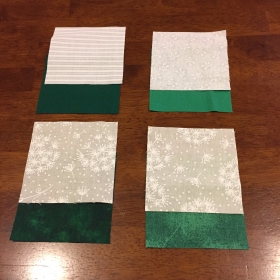
For this step you will be using the 3” squares of background fabric and 3″ squares of clover fabric.
Take one of each square and place them right sides together. Draw a diagonal line from corner to corner.

Now sew a quarter inch on both sides of this line.
Repeat for all 3” squares.
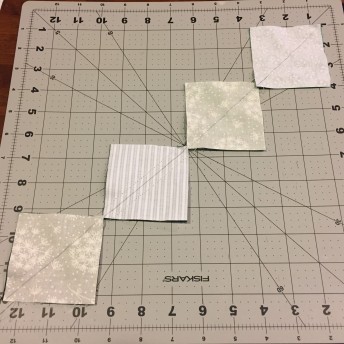
Cut along the line you drew and press seam.

Trim these down to 2.5” squares.
You should end with eight half square triangle squares.
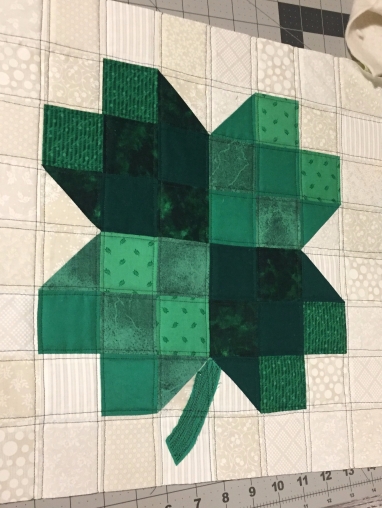
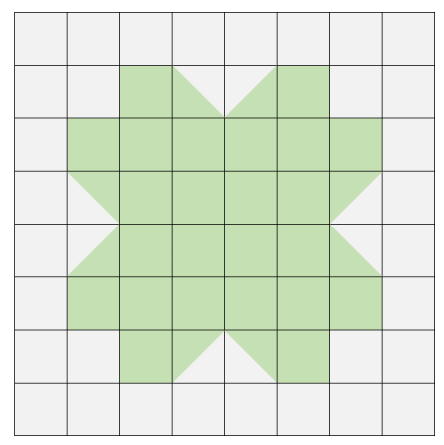
Assemble your block using the diagram. Once assembled decide whether you want a stem or not. It is personal preference. I decided to add one using a scrap from an earlier step. To attach it to my quilt I sewed lines through the stem multiple times. I wanted it to look like veins on a leaf or stem, but also to be something fairly simple. There are no rules here, just have fun and make it your own.

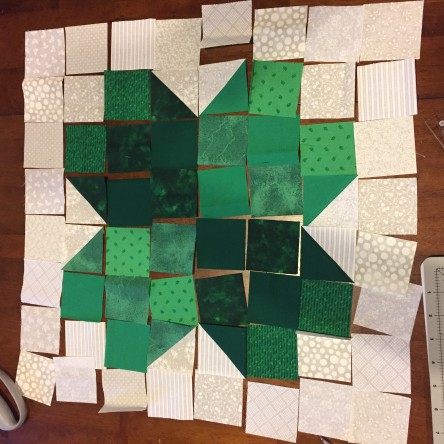
If you press your seams opposite directions for each row, it will be much easier to next each corner and patch your points.

When the top is complete create the quilting sandwich:
Backing fat quarter—Batting fat quarter—Quilt top
Pin, spray baste, or thread baste the sandwich so you can quilt it together.
Quilt however you desire: stitch in the ditch, horizontal lines, meander, the options are endless.
After quilted, trim edges and attach binding.
Finish by sewing the binding, and you will have a completed clover mini quilt.
Finished size: 16.5″ x 16.5″.
Instructions Without Pictures:
LUCKY, LUCKY
Prep:
Dig in your stash for green and cream fabric. Or whatever floats your fancy.
You will need:
1/4 yard of green {clover fabric}
1/4 yard of tan/cream {background fabric}
One fat quarter {backing}
One fat quarter of batting
Two 2” strips {binding}
*You could also use mix and match your fabric as I did.*
Chopping Block:
Cut two 2.5” strips of clover fabric.
Now, cut 24 2.5” squares from the clover strips.
Cut two 2.5” strips of background fabric.
Now, cut 32 2.5” squares from the background strips.
Depending on the width of your fabric, you might need three 2.5” strips.
*Note: If you are unable to get the full 34 squares from these strips, you could also cut down the scraps in the next step to get the remaining squares.
Cut one 3” strip of clover fabric.
Cut this into four 3” squares.
*If you were unable to cut all your squares earlier, use the scrap from this step to cut the remaining squares.
Cut one 3” strip of background fabric.
Cut this into four 3” squares.
*If you were unable to cut all your squares earlier, use the scrap from this step to cut the remaining squares.
Stitchin’ Time:
For this step you will be using the 3” squares of background fabric and 3″ squares of clover fabric.
Take one of each square and place them right sides together. Draw a diagonal line from corner to corner.
Now sew a quarter inch on both sides of this line.
Repeat for all 3” squares.
Cut along the line you drew and press seam.
Trim these down to 2.5” squares.
You should end with eight half square triangle squares.
Assemble your block using the diagram. Once assembled decide whether you want a stem or not. It is personal preference. I decided to add one using a scrap from an earlier step. To attach it to my quilt I sewed lines through the stem multiple times. I wanted it to look like veins on a leaf or stem, but also to be something fairly simple. There are no rules here, just have fun and make it your own.
When the top is complete create the quilting sandwich:
Backing fat quarter—Batting fat quarter—Quilt top
Pin, spray baste, or thread baste the sandwich so you can quilt it together.
Quilt however you desire: stitch in the ditch, horizontal lines, meander, the options are endless
After quilted, trim edges and attach binding.
Finish by sewing the binding, and you will have a completed clover mini quilt.
Finished size: 16.5″ x 16.5″.
Happy St. Patrick’s Day!
See you at the machine,